Repository navigation
Support for SONOFF Smart Power Meter Switch | POW Elite #15856

Description

PROBLEM DESCRIPTION
Is it possible to use Tasmota on the new SONOFF POW Elite?
I found some Pictures here.
It´s based on an ESP32 and the power measuring is done with a CSE7759B (same as used in SONOFF POW R2).
But what´s about the LCD driver?
REQUESTED INFORMATION
Make sure your have performed every step and checked the applicable boxes before submitting your issue. Thank you!
- Read the Contributing Guide and Policy and the Code of Conduct
- Searched the problem in issues
- Searched the problem in discussions
- Searched the problem in the docs
- Searched the problem in the chat
- Device used (e.g., Sonoff Basic): _____
- Tasmota binary firmware version number used: _____
- Pre-compiled
- Self-compiled
- Flashing tools used: _____
- Provide the output of command:
Backlog Template; Module; GPIO 255:
TO REPRODUCE
Steps to reproduce the behavior:
EXPECTED BEHAVIOUR
A clear and concise description of what you expected to happen.
SCREENSHOTS
If applicable, add screenshots to help explain your problem.
ADDITIONAL CONTEXT
Add any other context about the problem here.
(Please, remember to close the issue when the problem has been addressed)
Activity
arendst commentedon Jun 23, 2022
I have one on order. Will see what's possible.
dervomsee commentedon Jul 1, 2022
I received my POW elite yesterday and tried to run my own Platformio code on it.
The used hardware is the following:
As usually the button is connected to GPIO00 to enable the flash mode. It is possible to flash a basic program but it is not starting correctly. I based the first test program on the OTA example (https://github.com/espressif/arduino-esp32/blob/master/libraries/ArduinoOTA/examples/BasicOTA/BasicOTA.ino).
It connects to the WIFI, but does not start properly and it is not possible to run a OTA update.
In Platformio i used board = esp32dev as the base.
Does anyone has a idea, what stops the program running on the ESP?
sfromis commentedon Jul 1, 2022
Did you try just flashing the standard Tasmota build? If that works......
dervomsee commentedon Jul 1, 2022
Hmm, good Idea. I started with my own firmware to play with the IOs and the LCD.
I will try the default image later..
Update: Great, this works. Maybe my build environment is broken.
Now Tasmota runs on my POWR320D
ESP Chip Id 1124244 (ESP32-D0WD-V3 rev.3)
Flash Chip Id 0x16405E
Flash Size 4096 KB
Program Flash Size 4096 KB
Program Size 1397 KB
Free Program Space 1482 KB
Free Memory 159.0 KB (frag. 28%)
arendst commentedon Jul 2, 2022
GPIO00 = Button1
GPIO02 = Relay1 (320D - bi-stable - Off)
GPIO05 = LedLink_i
GPIO13 = Relay1 (316D)
GPIO14 = TM1621 DA
GPIO15 = Relay1 (320D - bi-stable - On)
GPIO16 = CSE7766 Rx
GPIO18 = Led_i1
GPIO25 = TM1621 CS
GPIO26 = TM1621 RD
GPIO27 = TM1621 WR
Also DO NOT CONNECT SERIAL WHILE AC IS CONNECTED. Just blew my Earth Leakage Circuit Breaker. No visible damage. Pfew. How could I forget...
Current template for POWR316D is:
barbudor commentedon Jul 2, 2022
Lcd driver datasheet
Titan Micro TM1621 Lcd driver.pdf
Chinese but seems understandable. Otherwise Google translate is our friend 😊
sfromis commentedon Jul 2, 2022
Some driver code found here: https://github.com/emsyscode/TM1621
nobodyman1 commentedon Jul 3, 2022
I found the HT1621 which looks very similar to me.
Nuffic commentedon Jul 3, 2022
TH Elite seems to have the same base as POW Elite (by the looks at least). Would be nice to get support for it as well. I have few of them here + DS18B20, THS01 sensors. I can share info if needed, willing to help any way I can.
sfromis commentedon Jul 3, 2022
Looks like support for both is in the works.
513 remaining items
capoccio1 commentedon Aug 3, 2024
Hi, something strange is happening.
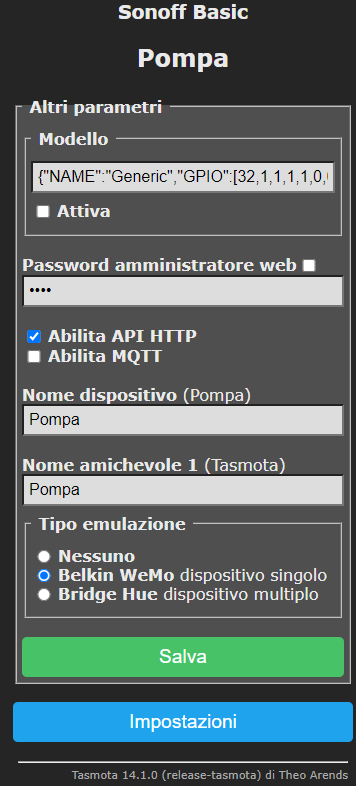
Since I updated all my devices to the new firmware 14.1.0 I can no longer detect them from Alexa, it always gives me "device not connected".
I tried in Alexa to delete all the dev
ices and search again but it doesn't find them.
Can you give me some suggestions?
void-spark commentedon Dec 5, 2024
POWR320D, flashed it using the web flasher (https://tasmota.github.io/install/, default selection 'Tasmota'), had the usual issue of it boot cycling when connected only with 3.3v from the USB serial converter (tried adding another ESP32 module to add some more power, but it seems to need a lot.) But connecting it to AC power (after disconnecting serial!!) I got it into AP, used my phone to connect to it, opened page "http://192.168.4.1" (had to type the http part also, and had to disable data), set up wifi, used the POW320D template, and all is well :D Tasmota is still awesome :)
But one note for others, I always solder a header on the board to easily connect the USB serial module.
On the (my) POWR320D, the pins will stick out in the back, and that's exactly where they have the plastic ridge which prevents light from the little leds escaping.. The case will not fit together. For this module, don't solder the header :D Or do it in such a way that the back of the PCB is perfectly flat, I guess you could insert the header only a bit, and let the solder seep in :)
antoniocanelas commentedon Dec 29, 2024
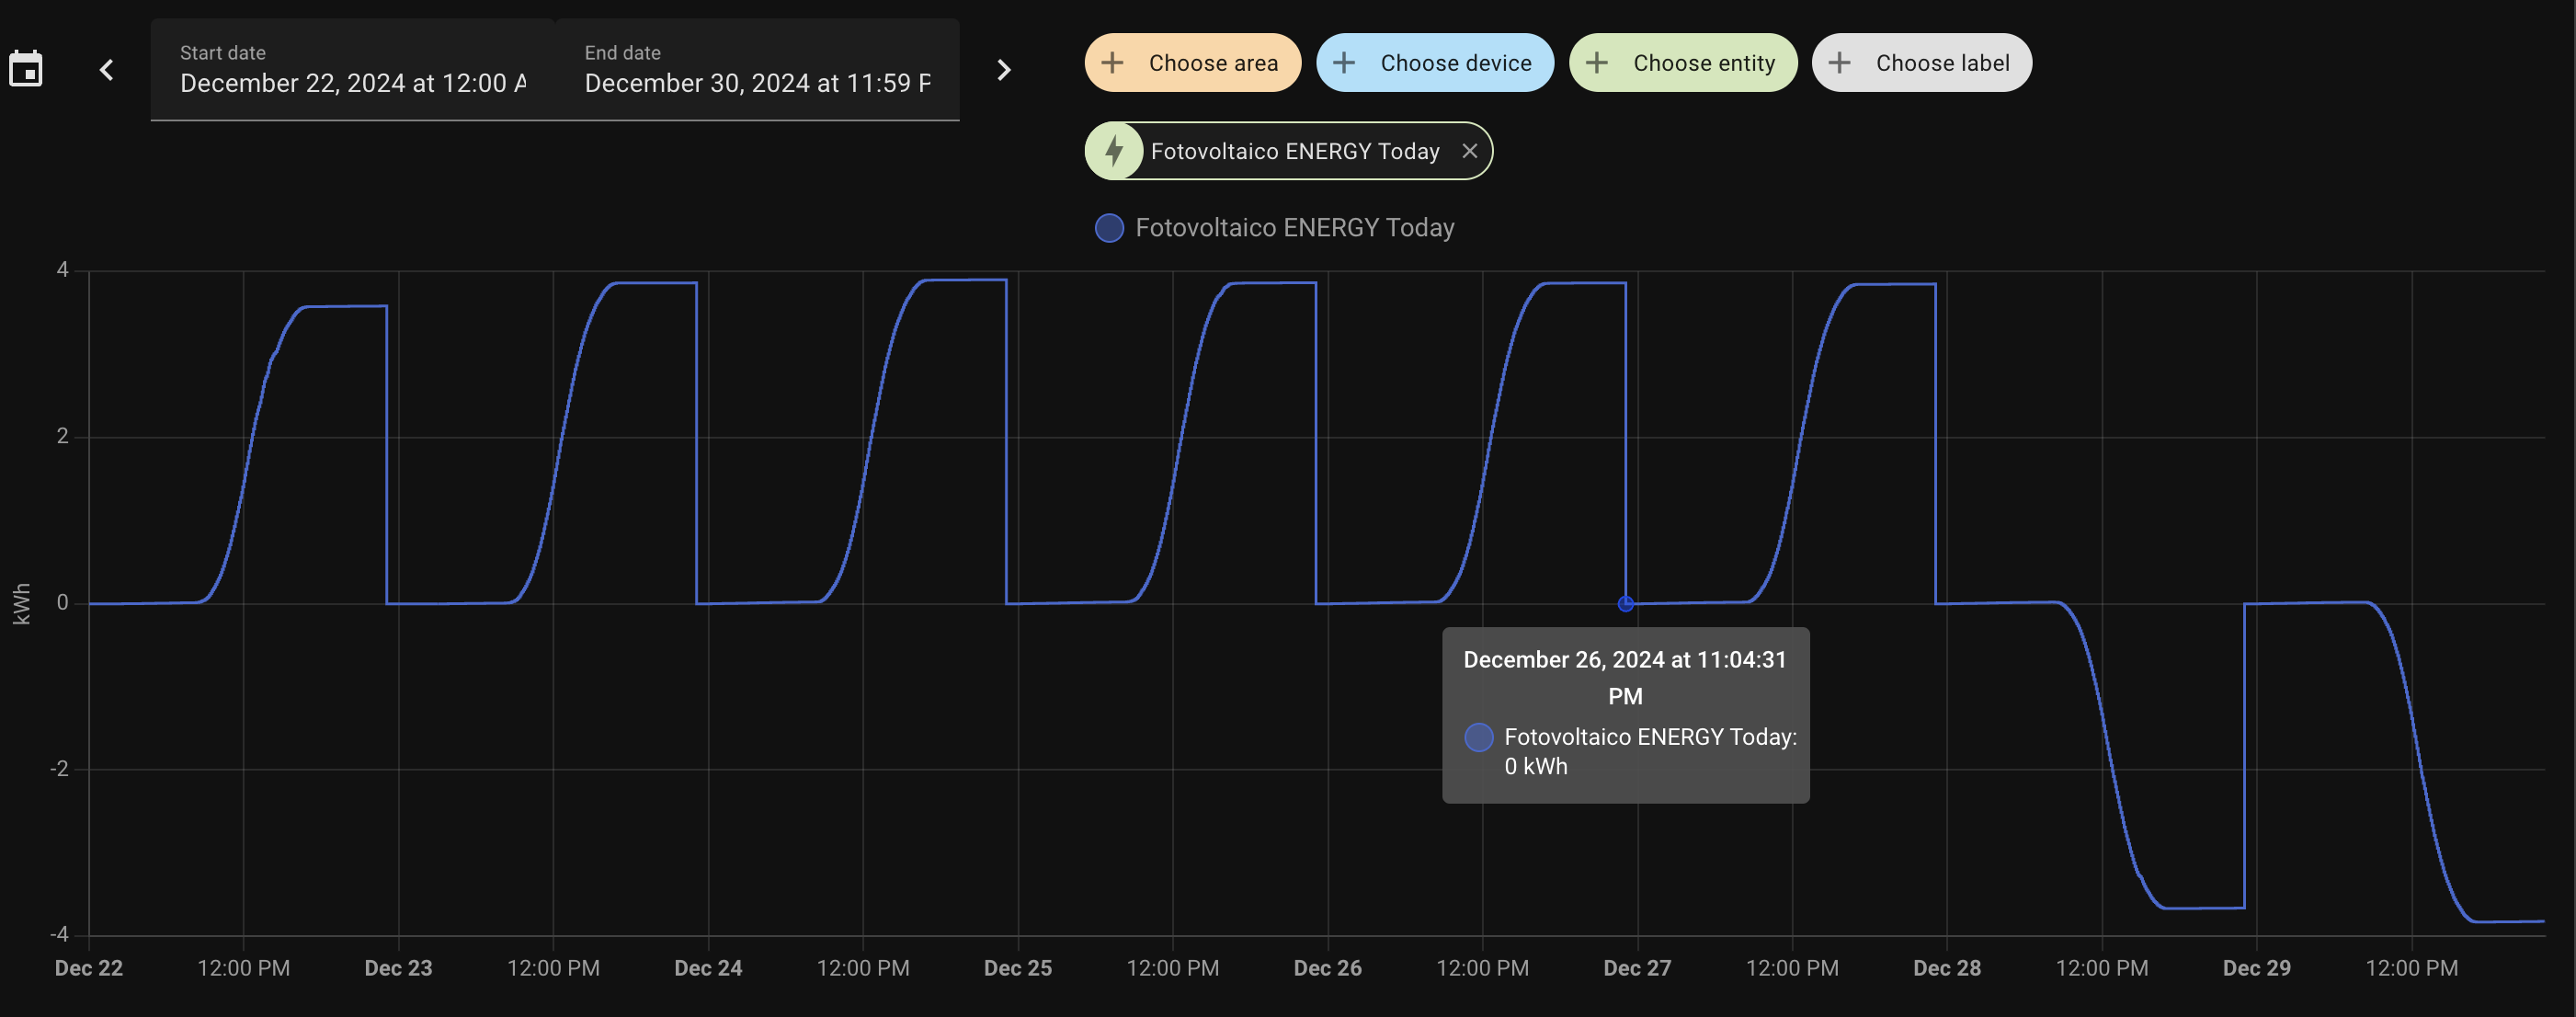
Hi all, after an firmware update, now I have Solar Production with negative numbers. Do you know how to solve this?
Lesateq commentedon Feb 27, 2025
I have used POWR316 & POW320 in several applications. Working with the serial port is like working with explosives. One error and your done. To avoid any error I have integrated a HC-06 Bluetoothmodule in the device. If you glue a 4 pin header in the corner of the plastic case the HC-06 it is quite securely fixed. You can use the Bluetooth access to upload firmware, use the serial monitor, etc. If you brick the device you can just reinstall working firmware. And if you connect the mains in a safe way you have a perfect and safe development environment. For console I use Serial Bluetooth Terminail (Android). On Windows11 you can configure a serial port after connecting Bluetooth to use Arduino IDE. For rapid development is use Arduino OTA to upload firmware and meanhile I keep the Serial Bluetooth Terminal connected for console. Tip: do not forget to configure the HC-06 before you integrate it in the POWR316/320. You need to connect it to a serial port/FTDI to configure it...
arendst commentedon Feb 27, 2025
Nice idea. I wonder what the hole is for.
Lesateq commentedon Feb 27, 2025
That hole was indeed for an earlier version with a physical connection... Not needed anymore when using the HC-06. I also made a development version of the Sonoff S60 with the HC-06. But disassembled and built in a Strapubox.
arendst commentedon Feb 28, 2025
Great. I ordered some HC-05 and see if they can be used as well.
arendst commentedon Mar 4, 2025
Been playing with both HC-05 and HC-06. Both fail to keep a bluetooth connection active on my Windows 11 Pro.
So for now I'm stuck to using my old solution:
Lesateq commentedon Mar 4, 2025
The great old opto couplers... In the past I used an FTDI type with opto couplers, thats why the hole was drilled in the unit. In my setup I am using a couple of Android devices with Serial Bluetooth Terminal and that works well without dropping the connection. In the past I have used a Windows 11 Home laptop a couple of times to upload firmware with the HC-06 and succeeded. However, I will check about dropping the Bluetooth connection. I also connected from Mac/Sonoma, but since the last OS update it doesn't work anymore. Not to mention various frustrations with BLE on the Mac in other applications. Since I work with Bluetooth our carpenter has drilled some big screws in the windows in my home office (on the second floor). That is to prevent me to actually jump out of the window...
joba-1 commentedon Mar 4, 2025
haha, yes, bluetooth and mental health is hard to combine.
Lesateq commentedon Mar 4, 2025
On my Windows 11 Home, equipped with Realtek 5 BT adapter and a very old driver it seems to stay connected; now just running to watch some console messages from the POWR316D.
arendst commentedon Mar 4, 2025
Thx. Just ordered the TP-Link UB500 which should use a realtek driver. To be continued.
Lesateq commentedon Mar 4, 2025
You are welcome. By the way, these are my COM settings using two HC-06's, named Lesateq1 and Lesateq2. Connected to POWR316 and S60. I remember I had some problems with communication on lower port numbers. Very peculiar since I could not find any device, application or driver using lower COM numbers. I hope your office is on the ground floor... Good luck.
arendst commentedon Mar 5, 2025
It worx using the TP-Link UB500 and HC-06!
Nice solution although before a connection is made I had to jump through some hoops which, I fear, I cannot reproduce ;-)
arendst commentedon Mar 5, 2025
And finally as a reminder how to configure HC-05 and HC-06 (both work fine) using Termite on a PC:
Both verified to work nicely on a shelly using the VoltLink USB adapter (Alas it needs swapped Rx/Tx signals to the bluetooth device) with it's tiny shelly pins and WITHOUT CONNECTING THE USB CABLE!!!!