Raspberry Pi GPIO: Labs
Welcome to the GPIO lab! This time, we're going to build a couple of circuits using the Rapsberry Pi. Grab your breadboard and a couple of cables.
Create a github repo called GPIO, initialise a local repo at ~/GPIO, and setup your github repo as a remote.
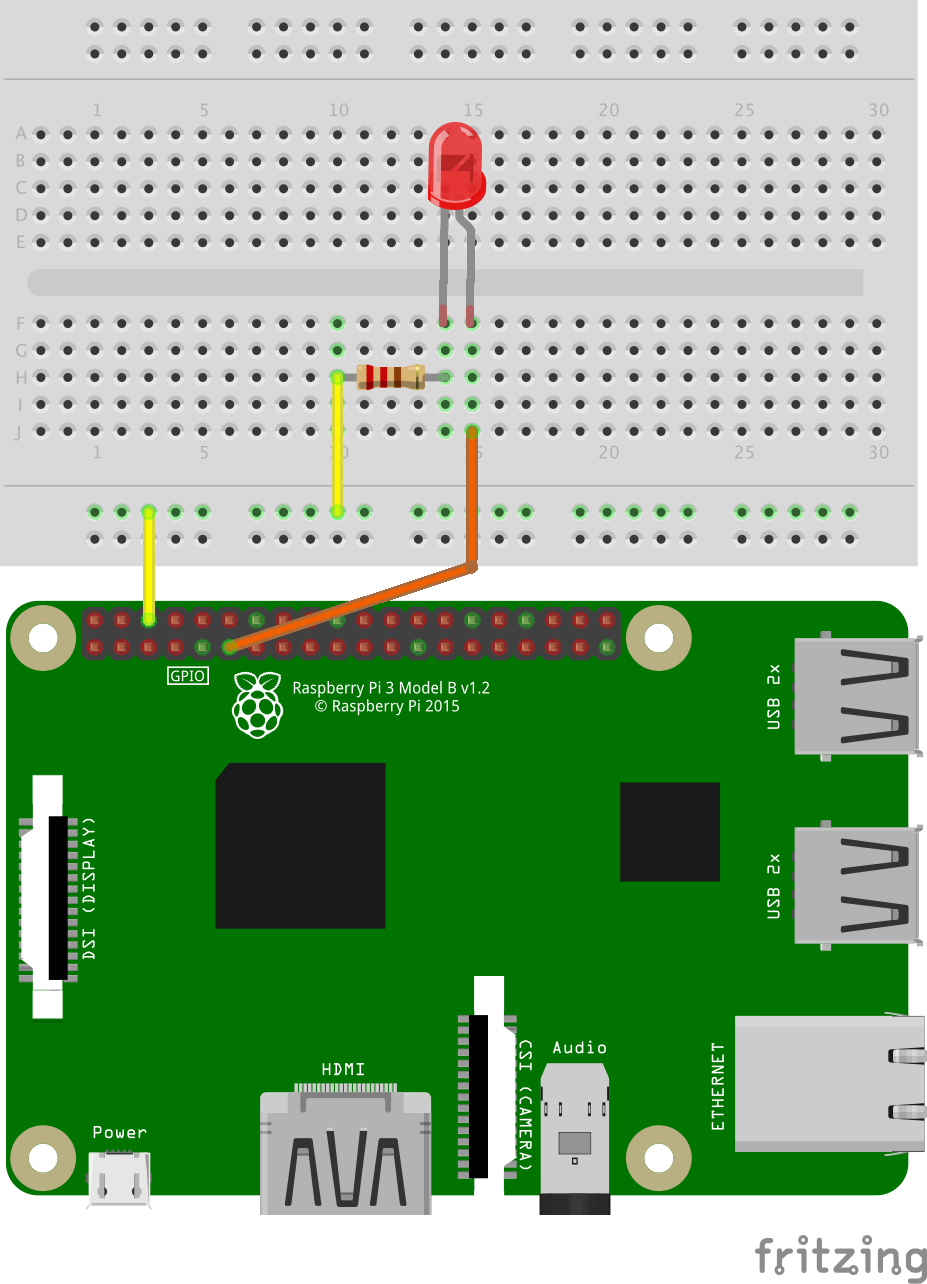
Take one cable and connect one of the GPIO Ground pins ("GND") to one of the negative rails on the breadboard - near the blue line.


Let's write some python! You should have the python gpiozero package installed (pip list to check). If you don't, sudo pip install gpiozero
from gpiozero import LED
from time import sleep

led = LED(17)

while True:
    led.on()
    sleep(1)
    led.off()
    sleep(1)
Save this in a file called ~/gpio/led.py. Check it in!
...that's it! Let's build the thing.
On your breadboard, take another cable and connect it to the GPIO 17 pin - it's a little way down the left side. Count carefully! Connect the other end of the cable to one of the vertical rails on the breadboard.
Put an LED and a resistor in series between the +ve and -ve rails on the breadboard. That means the resistor should connect the +ve rail to the +ve pin on the LED (the one with the longest leg!), and the -ve leg on the LED should connect to the -ve breadboard rail. It's important to get the LED the right way - it only works in one direction.
Run your script:
python ~/gpio/led.py
and watch the LED flash!
If it's not working, try swapping the cables over - they're probably just the wrong way around. And check your wires are attached to the correct GPIO pins!
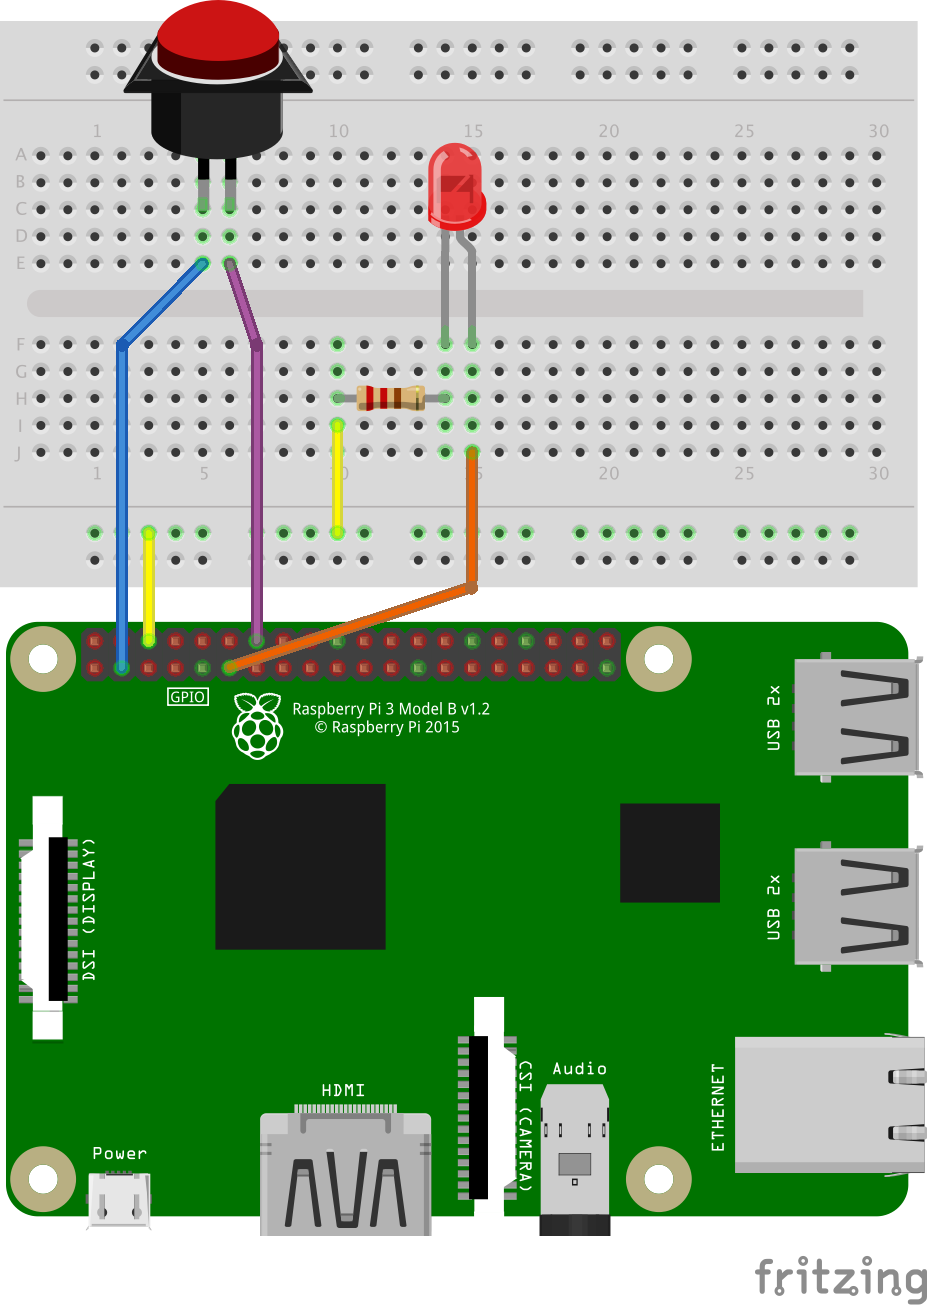
Let's read the status of a button. Take a third cable and connect it from GPIO pin 2 to another of the vertical rails on the board. Take a button and wire it in series from that rail to the -ve rail you setup earlier.
from gpiozero import LED, Button
from signal import pause

led = LED(17)
button = Button(2)

button.when_pressed = led.on
button.when_released = led.off

pause()
Save this in a file called button.py, alongside led.py. Don't forget to check it in :)
What happens when you run this program and push the button?
- Turn the button into a reset button for your raspberry pi
HINT:
from subprocess import call

def print_thing():
    print ("button pressed")

button.when_pressed = print_thing-
Using different LEDs, write a traffic lights program. When the user presses a button, the traffic should stop and the pedestrian should be allowed to walk. After a while, traffic should be allowed to move again.
-
Going back to yesterday's Web APIs lab - make something interesting happen when you push the button!
HINT: Why not try having the LED flash out your name in Morse code?