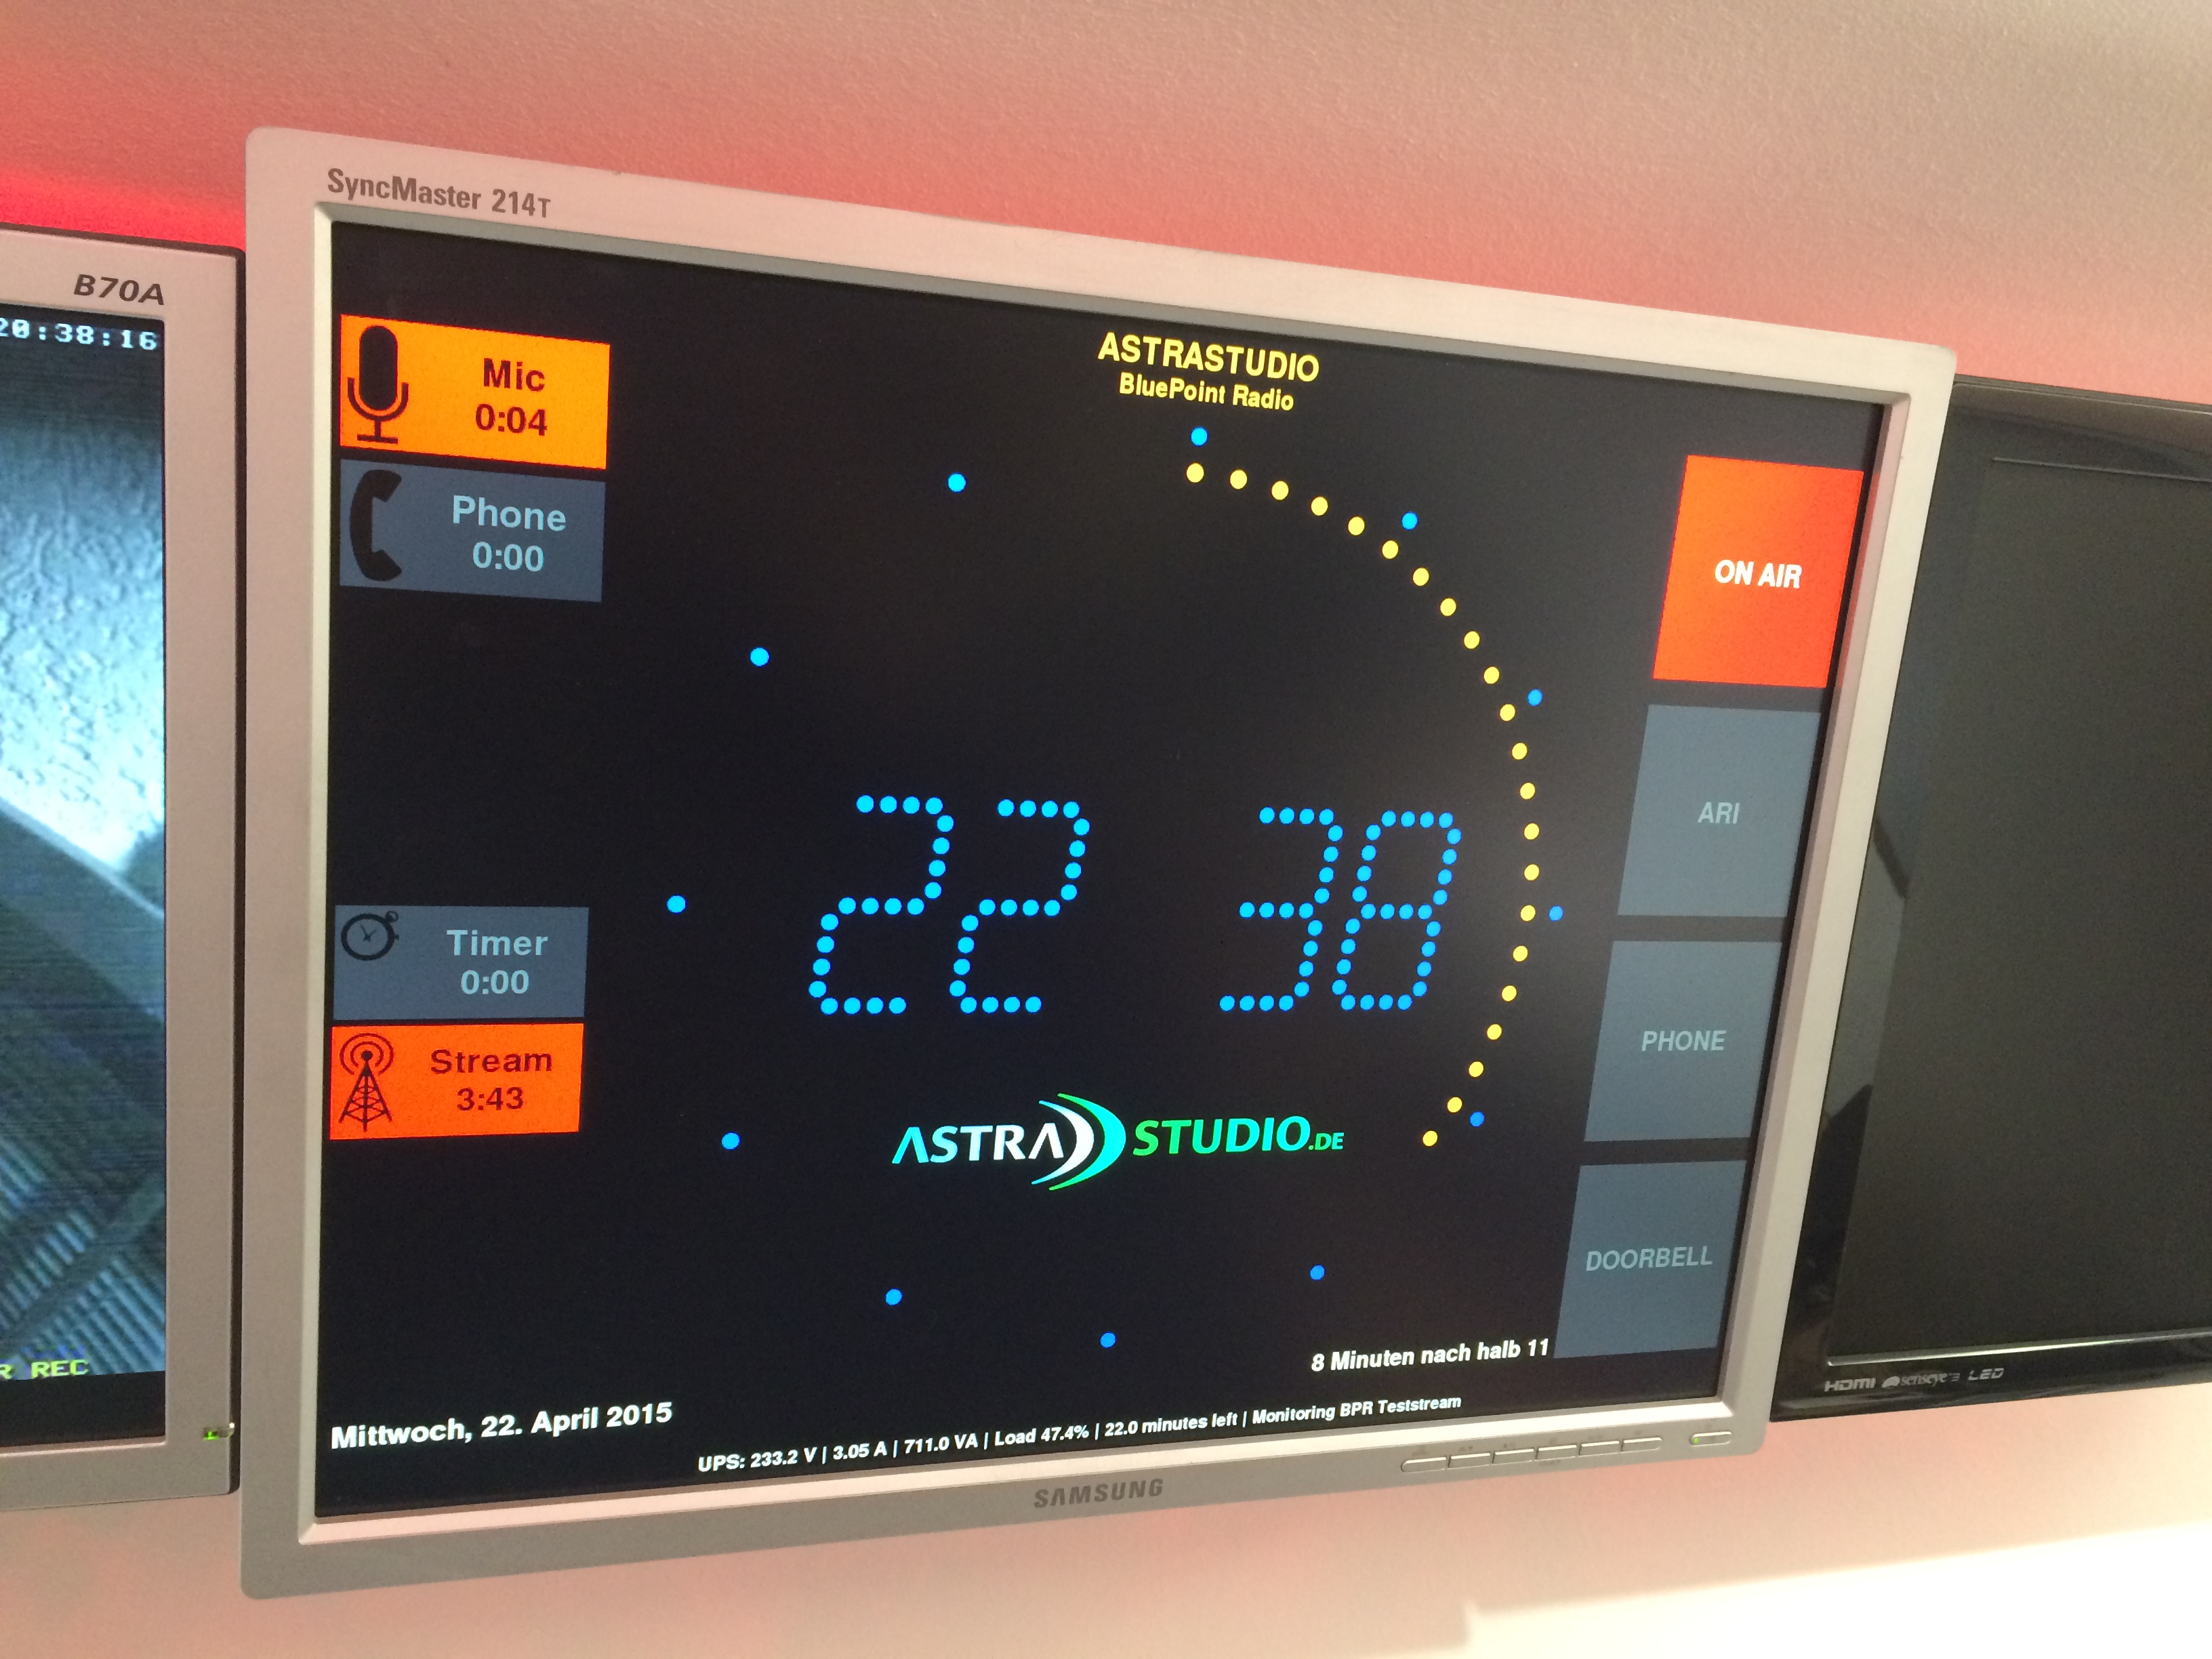
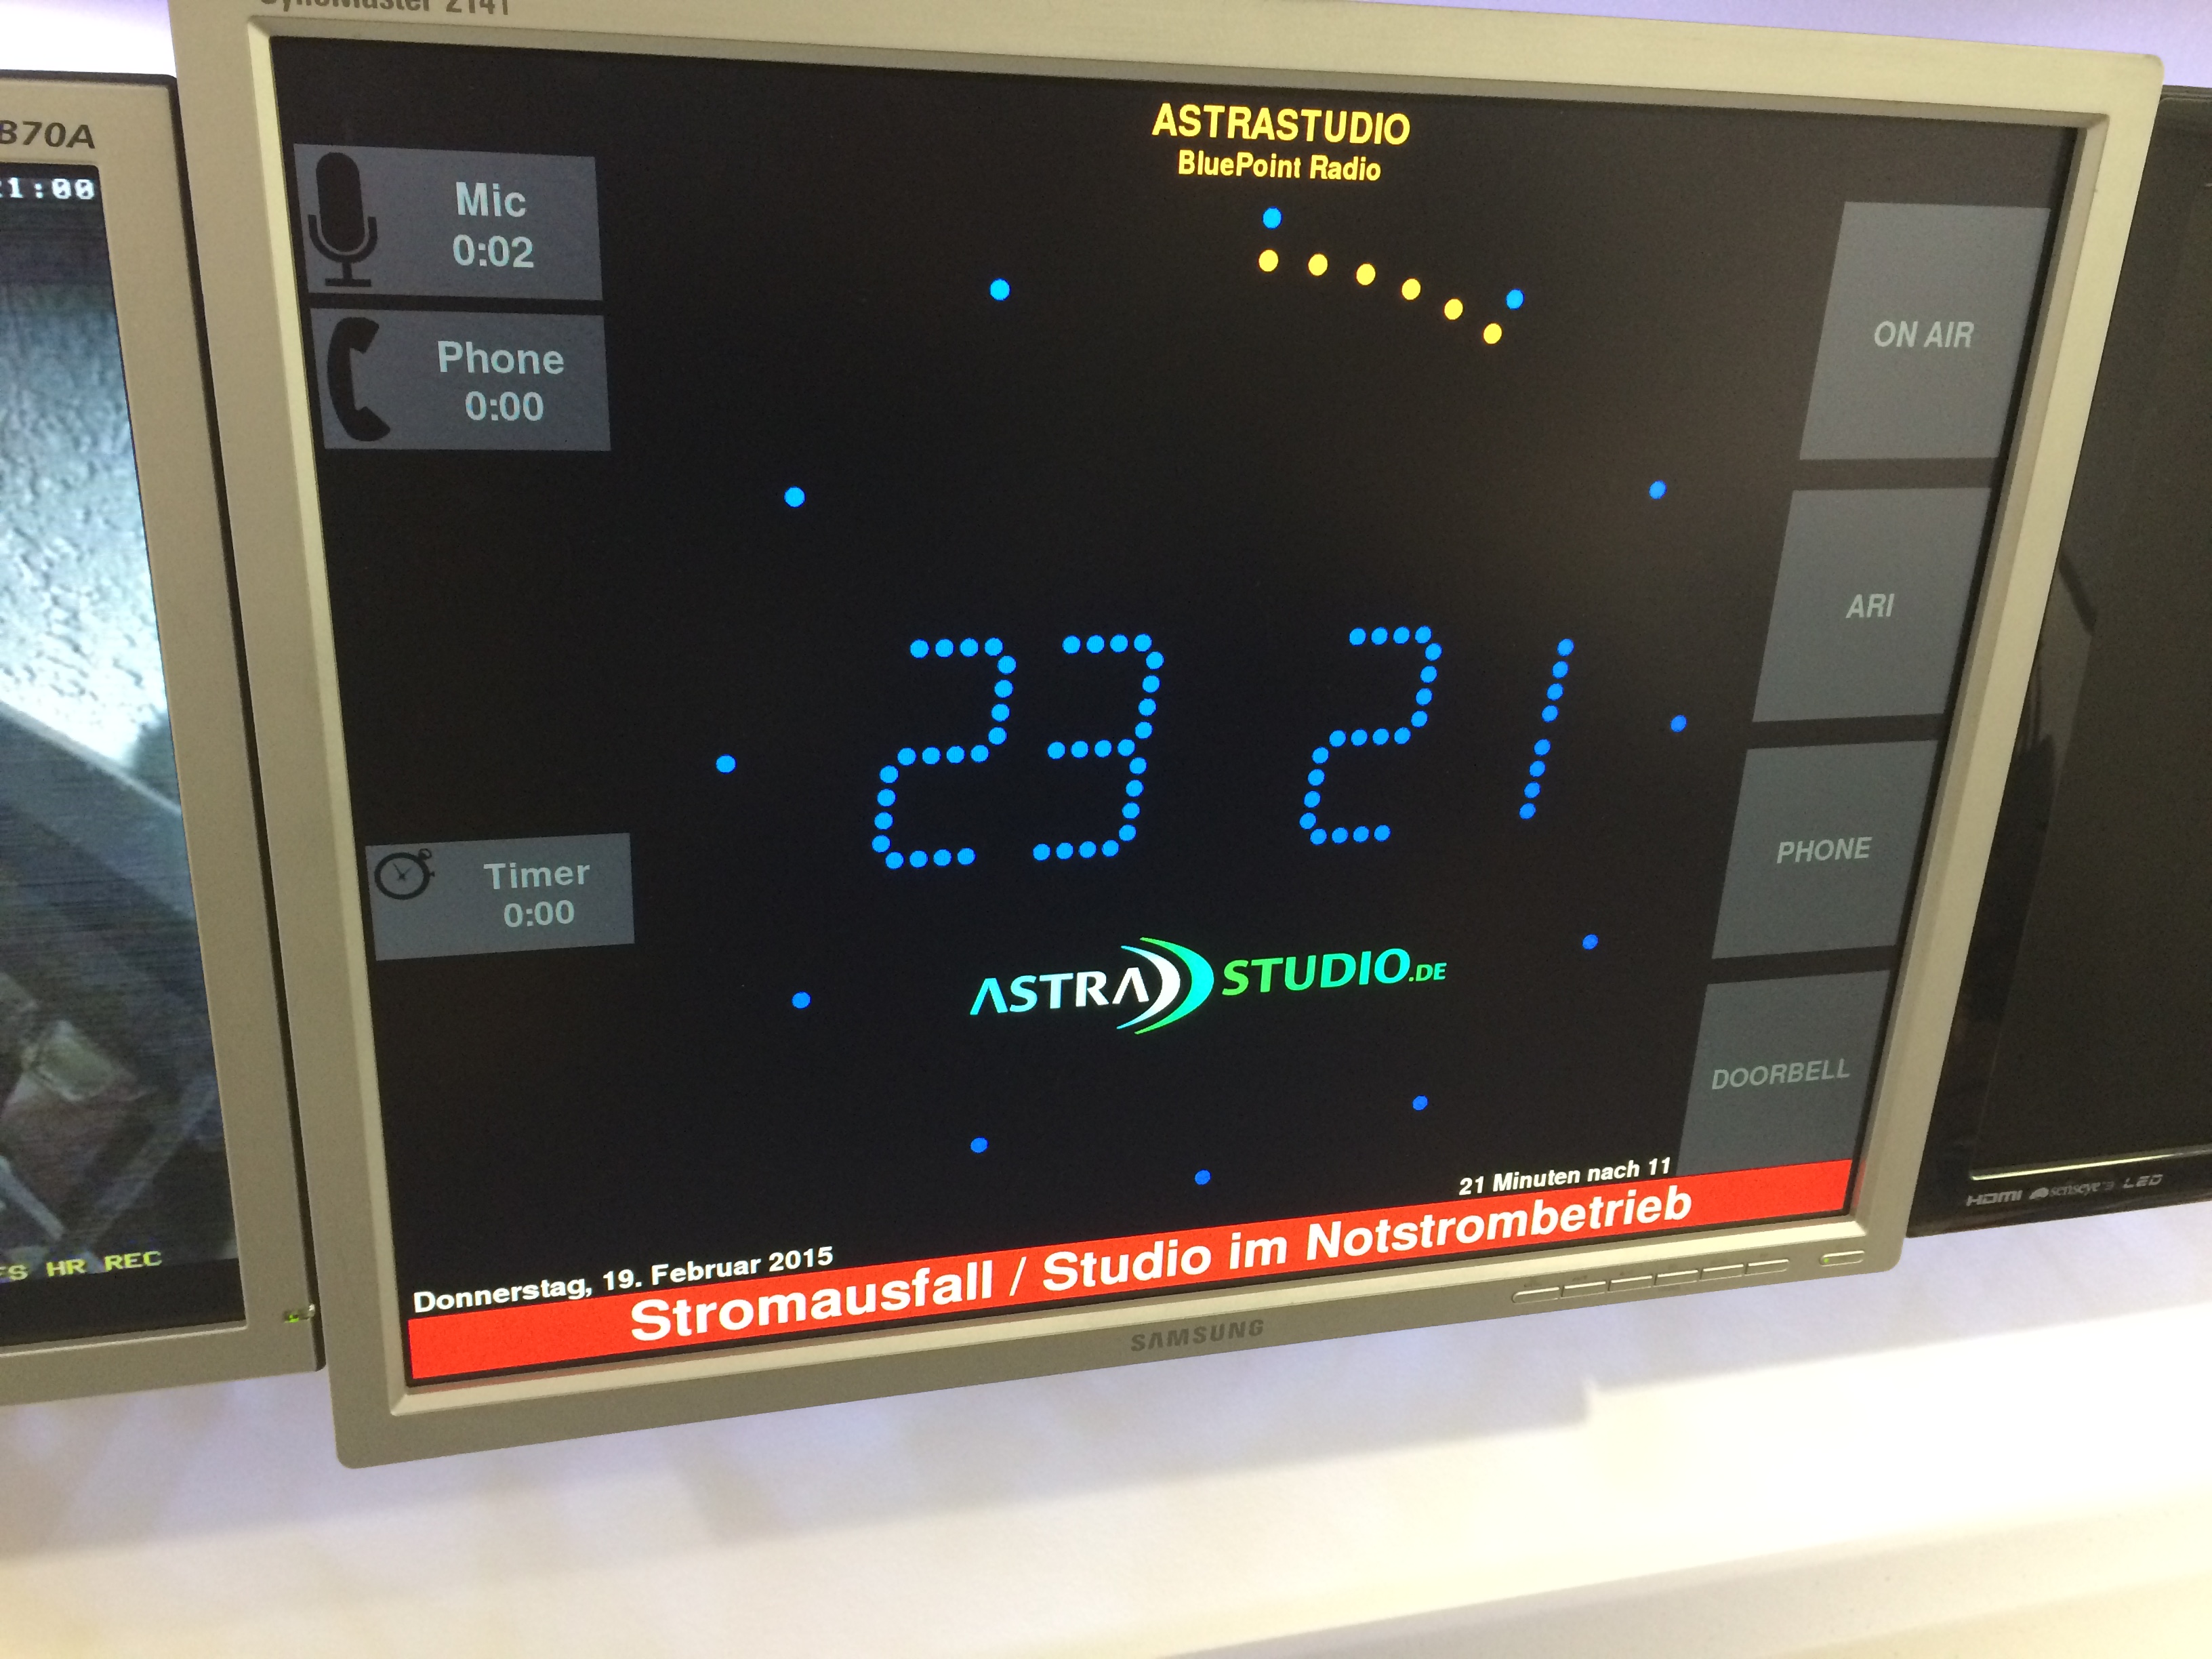
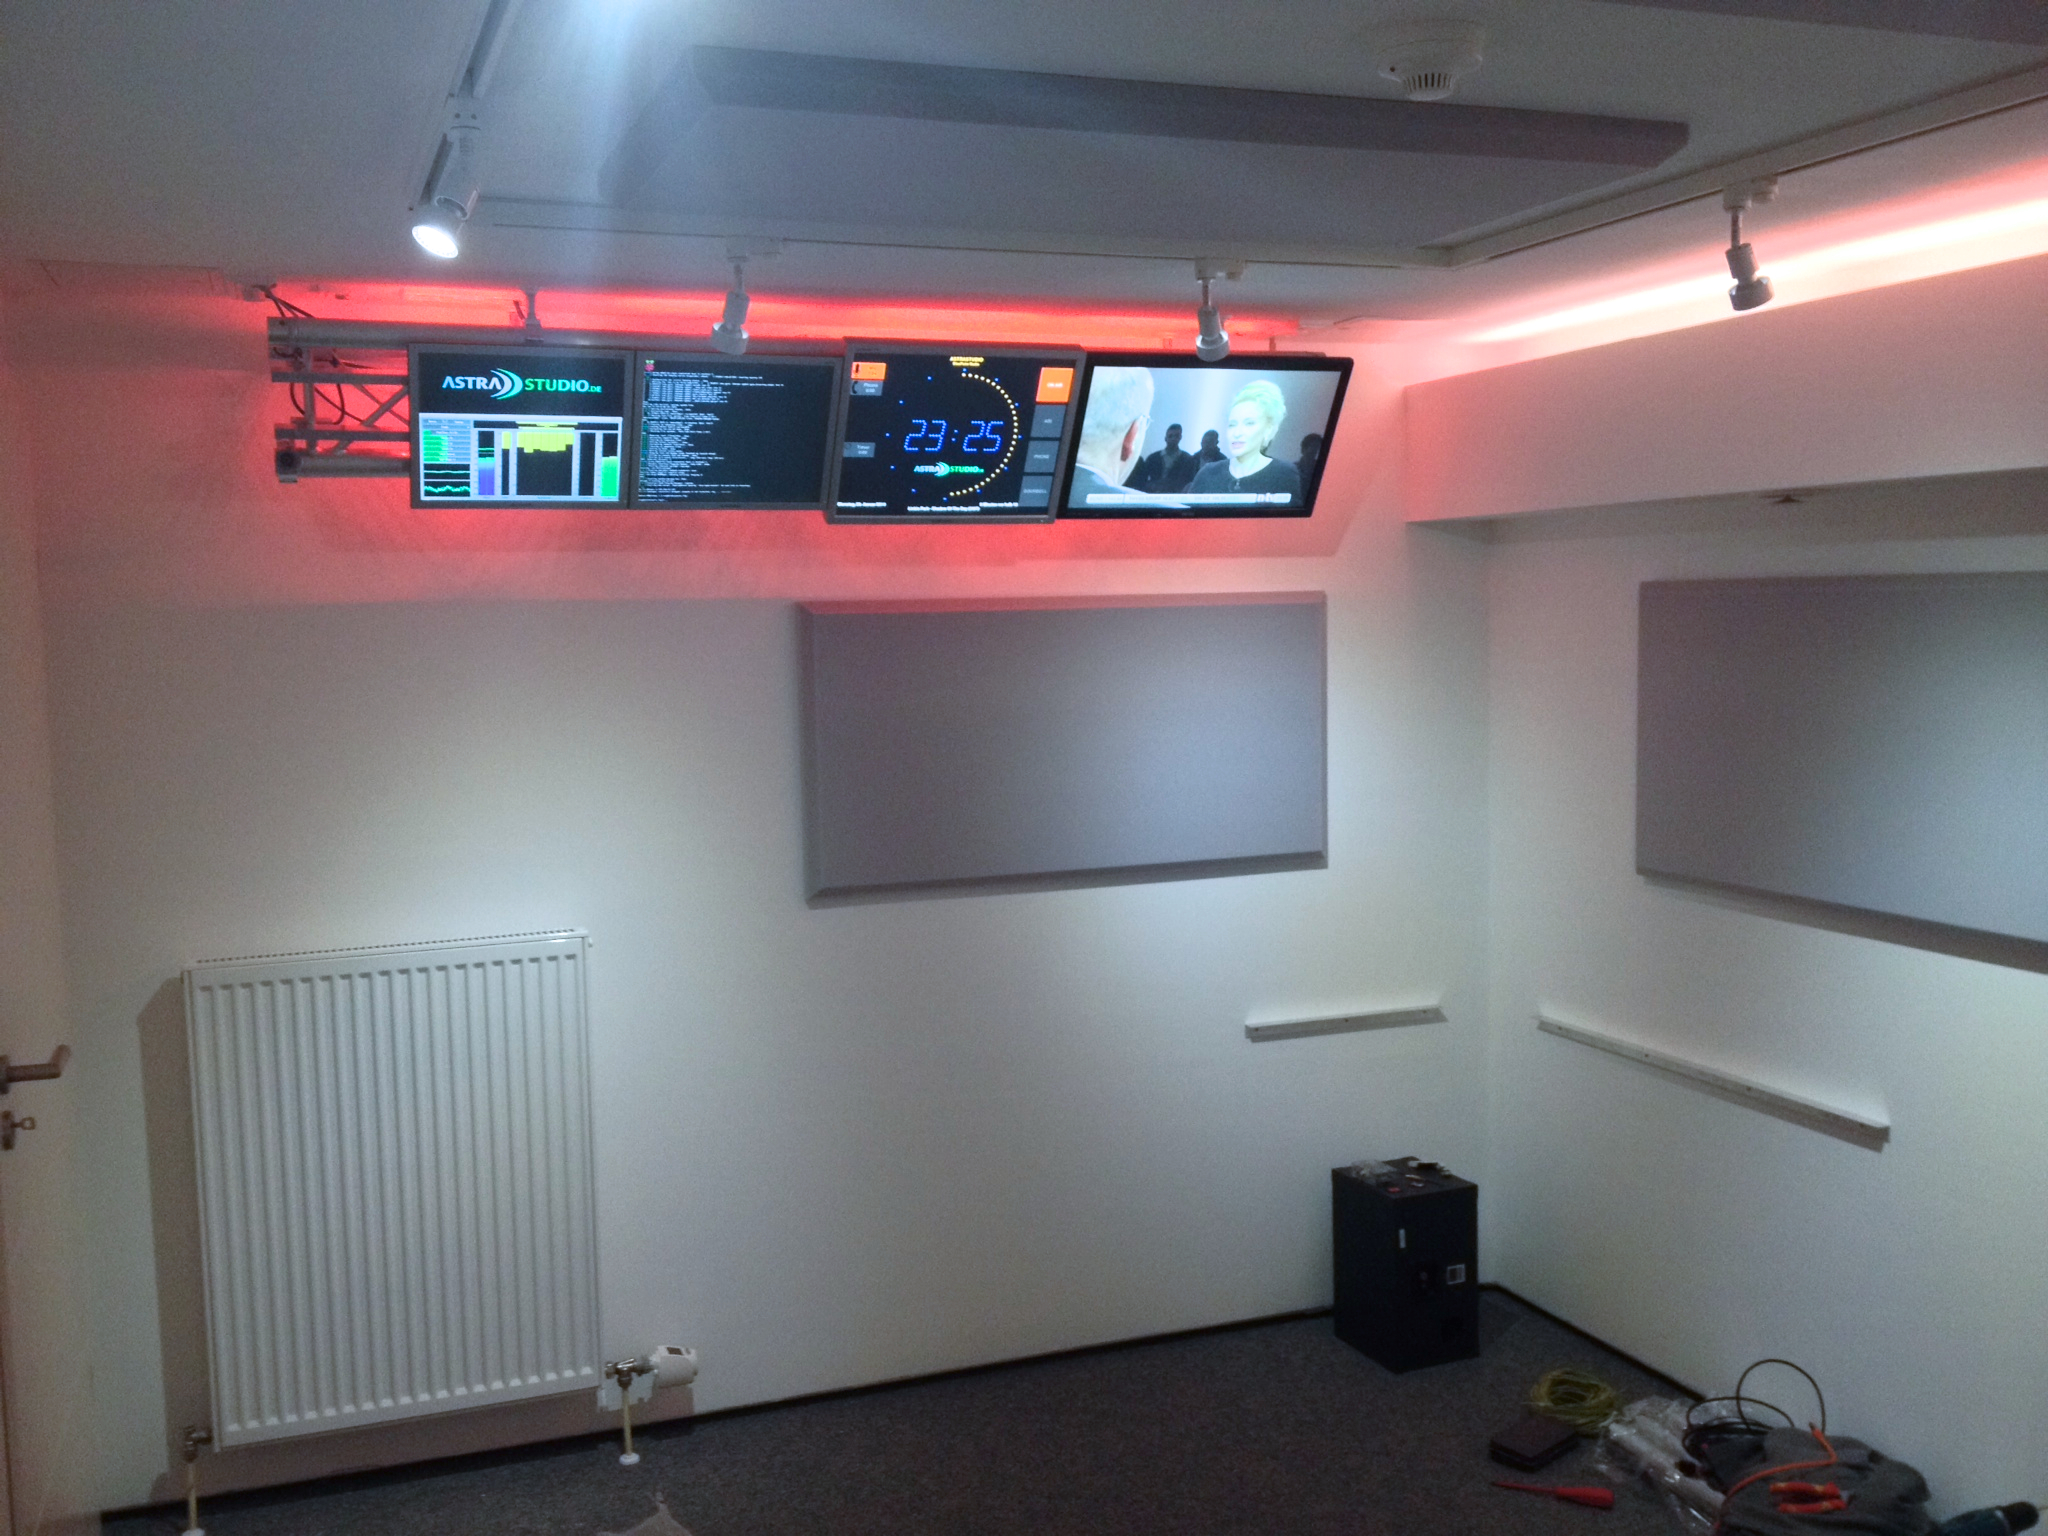
Multi purpose "OnAir Lamp" solution targeted for use in professional broadcast environments http://saschaludwig.github.io/OnAirScreen/
This project needs your help! If you find OnAirScreen useful, please consider making a donation or becoming a sponsor. Your support helps me continue working on this project, adding new features, fixing bugs, and maintaining the codebase. Every contribution, no matter how small, is greatly appreciated!

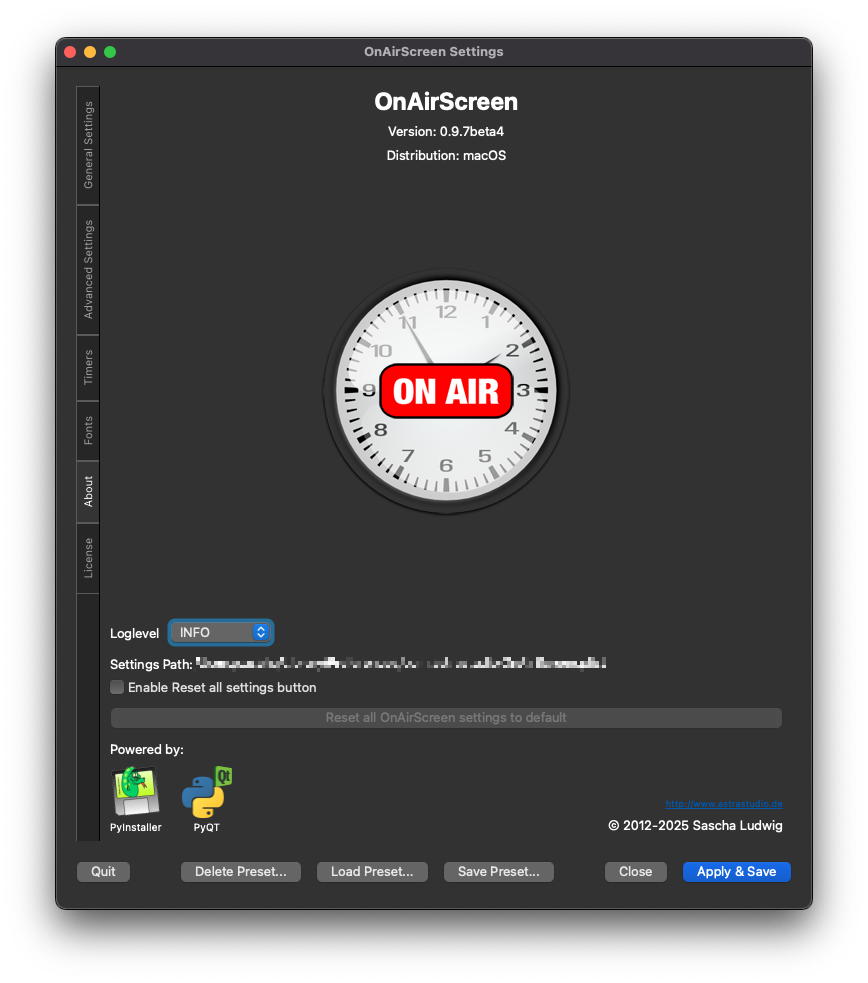
If you need ready-to-run Linux/Win/Mac executables, please visit https://www.astrastudio.de/shop/.
I also have a RaspberryPi version and a ready-to-run RaspberryPi SD-Card image in my shop.
And if you need extended support, please contact me.
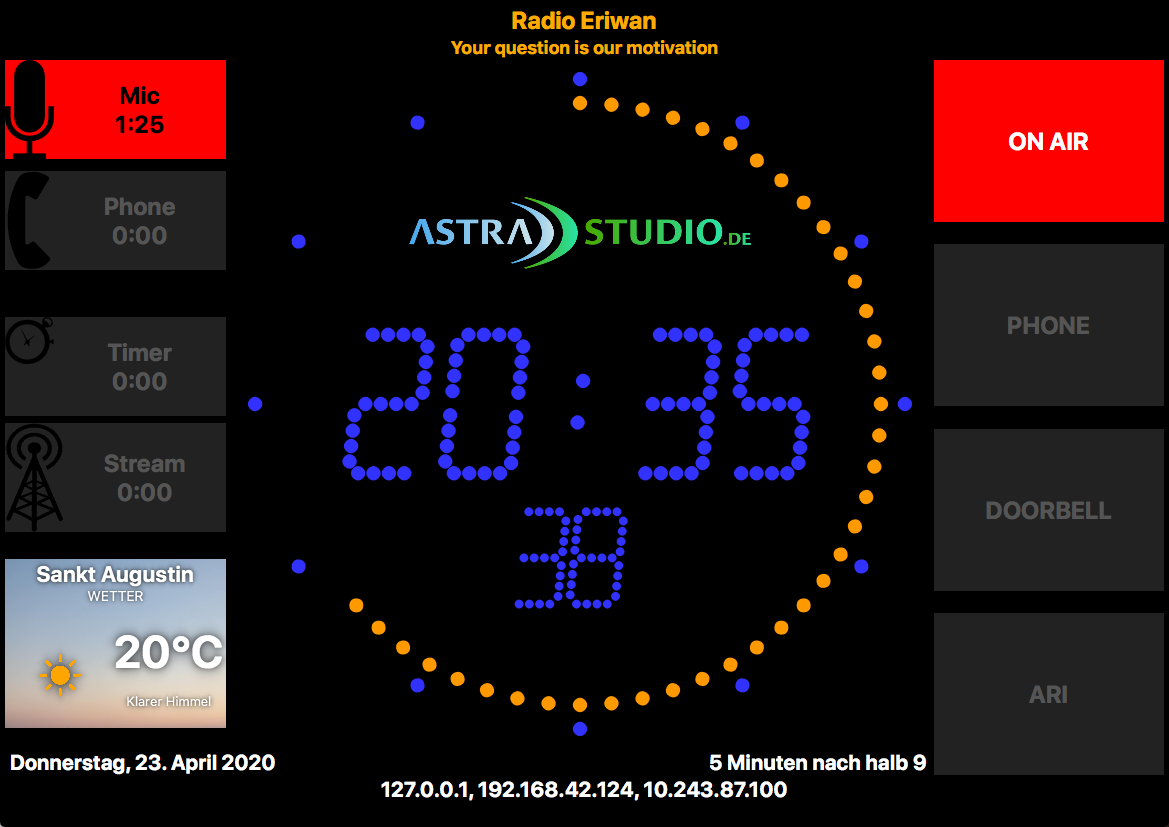
- Flexible integration into existing studio setups
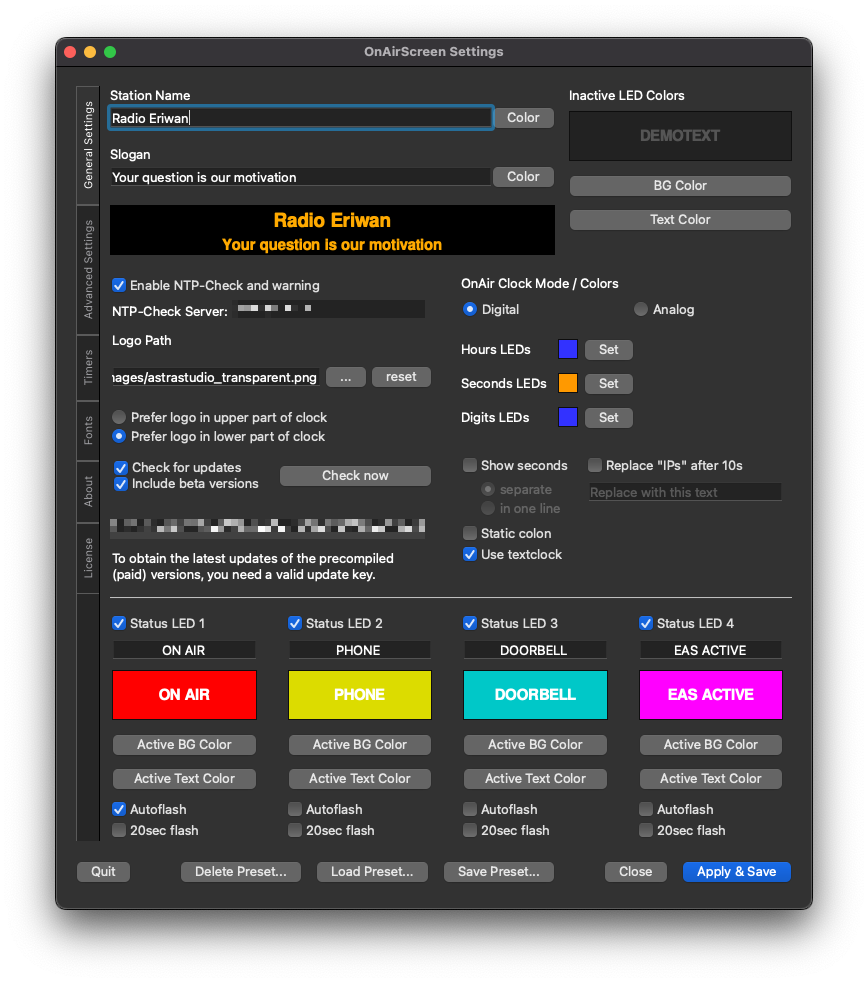
- Customizable logo, colors and labels
- 4:3 and 16:9/16:10 monitor aspect ratio support
- Easy installation (Win/Linux/Mac binaries available)
- Runs on RaspberryPi
- Runs on Windows, Mac, Linux
- Controlled via keyboard and network
- Web-UI for remote control via browser
- Web-UI: Dark Mode support with theme persistence
- Web-UI: Real-time status updates via WebSocket
- Web-UI: Warning priority system (NTP, Normal, Medium, High)
- Web-UI: Improved compact layout for better space efficiency
- REST-style API endpoints (/api/status, /api/command)
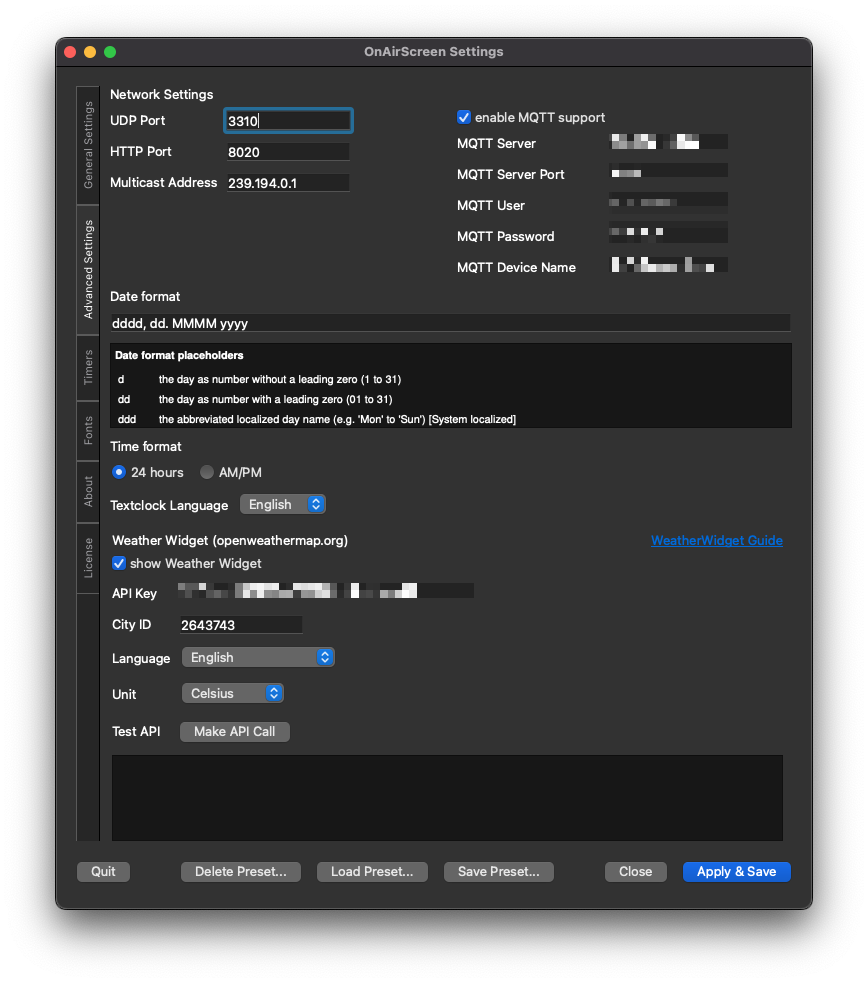
- MQTT integration with Home Assistant Autodiscovery support
- Event logging system for tracking all actions
- Configurable log level settings (DEBUG, INFO, WARNING, ERROR, CRITICAL, NONE)
- Command-line option to override log level (--loglevel)
- Tooltips for all settings widgets
- Preset/Profile management for saving and loading configurations
- Unified error handling system with custom exceptions for better error tracking and debugging
- Modular architecture with separated concerns (NTP, UI updates, system operations, etc.)
- Weather Widget
- static or blinking colon in digital clock mode
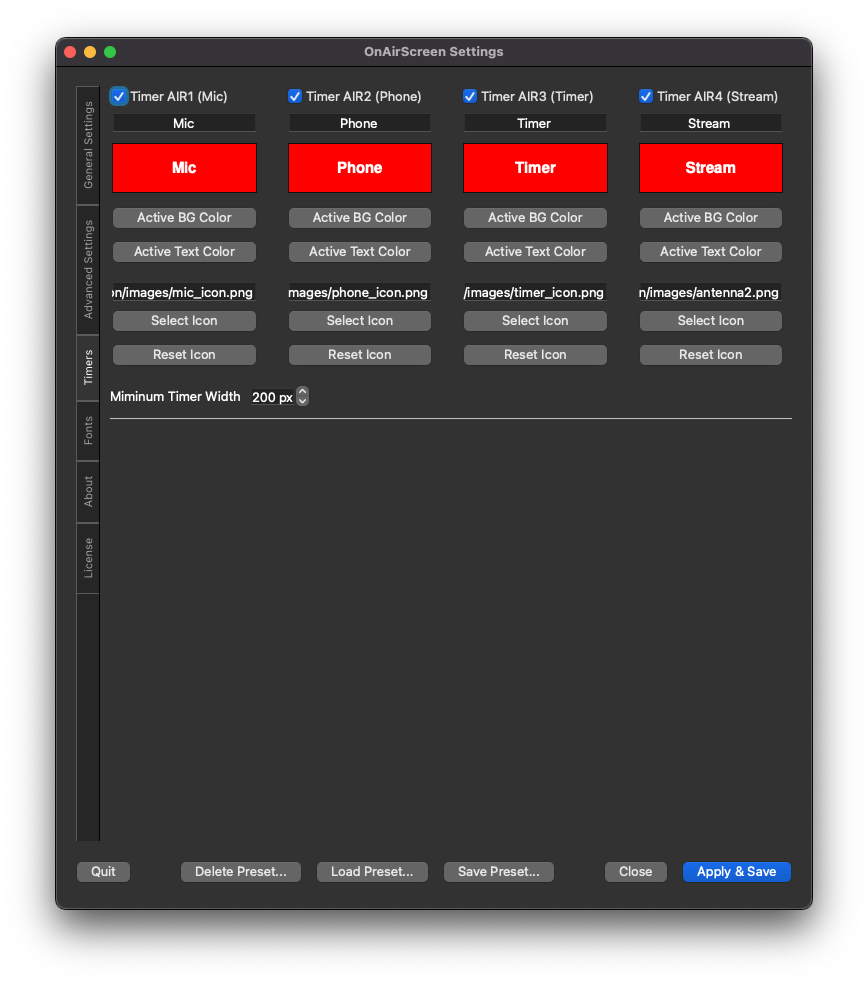
- OnAir Timer, Stopwatch, Countdown and more
| Hotkeys | Function |
|---|---|
Ctrl+F or F |
Toggle fullscreen |
Ctrl+Q or Q or Ctrl+C or ESC |
Quit OnAirScreen |
Ctrl+S or Ctrl+, |
Open settings dialog |
Space or 0 |
Timer start/stop |
. or , or R |
Timer reset to 0:00 |
1 |
LED1 on/off |
2 |
LED2 on/off |
3 |
LED3 on/off |
4 |
LED4 on/off |
M or / |
Mic Timer start/stop |
P or * |
Phone Timer start/stop |
Enter |
opens set timer dialog |
On OSX use the command ⌘ key instead of Ctrl
OnAirScreen can receive API commands via UDP port 3310
Here is an easy example on how to control a local OnAirScreen instance on a linux system.
Set LED1 Text to "FOO" and switch LED1 on:
echo "CONF:LED1:text=FOO" > /dev/udp/127.0.0.1/3310
echo "LED1:ON" > /dev/udp/127.0.0.1/3310OnAirScreen can receive API commands via HTTP (port 8010 by default).
Here is an easy example of how to control a local OnAirScreen instance on a linux system.
Set LED1 Text to "FOO" and switch LED1 on:
curl http://127.0.0.1:8010/?cmd=CONF:LED1:text=FOO
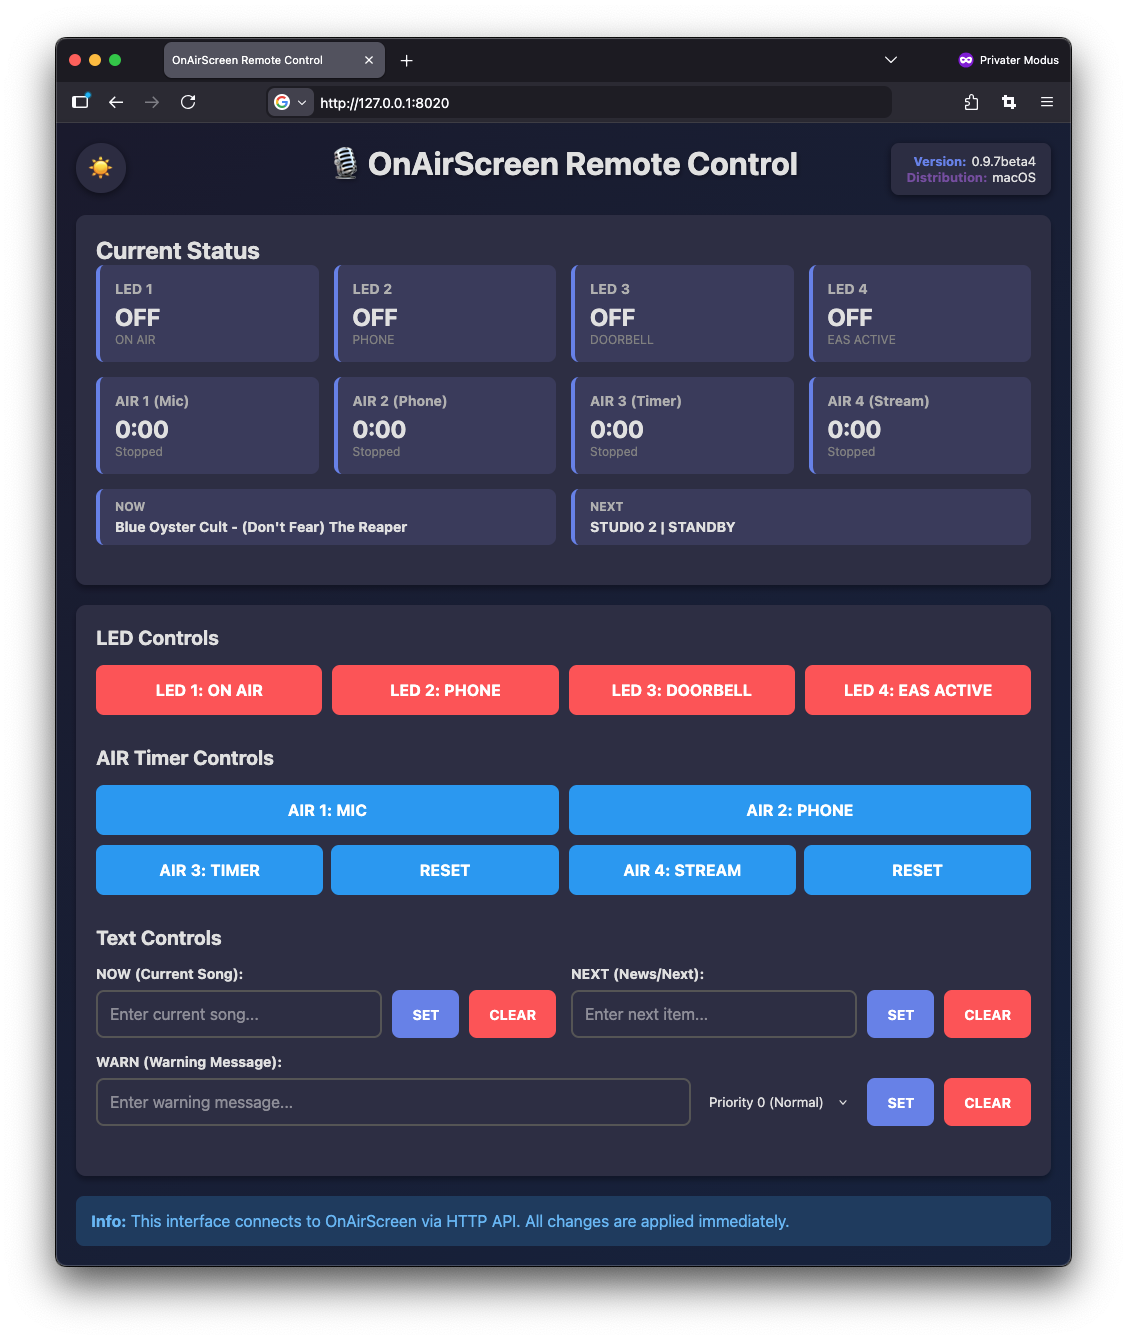
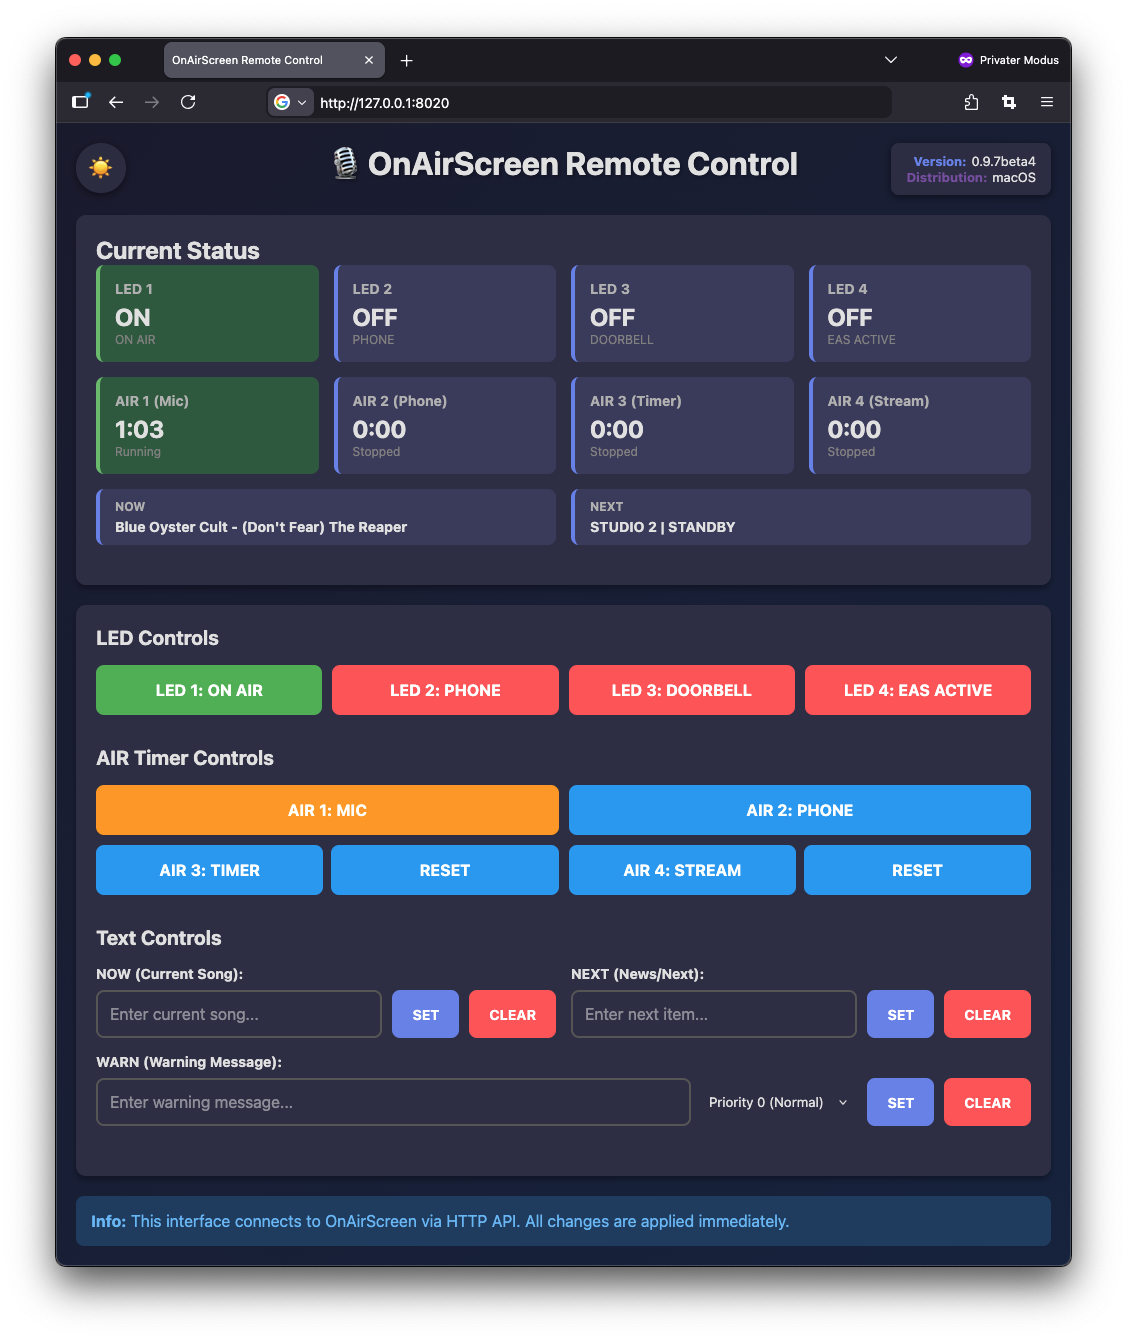
curl http://127.0.0.1:8010/?cmd=LED1:ONOnAirScreen provides a complete web-based remote control interface accessible via your browser.
Simply open http://127.0.0.1:8010/ (or the IP address of your OnAirScreen instance) in any modern web browser.
The Web-UI provides:
- Real-time status display for LEDs, AIR timers, and text fields (NOW/NEXT/WARN)
- Real-time updates via WebSocket (with HTTP polling fallback)
- Dark Mode support with automatic theme persistence
- Warning priority system: Display NTP warnings and user warnings with priorities (Normal, Medium, High)
- Delete warnings directly from status display with X button
- LED control buttons with toggle functionality
- AIR timer controls with start/stop and reset buttons
- Text input controls for NOW, NEXT, and WARN messages
- Compact, organized layout for better space efficiency
- Version and distribution information display
- Connection error handling with modal dialog
OnAirScreen also provides REST-style API endpoints:
Status Endpoint:
curl http://127.0.0.1:8010/api/statusReturns JSON with current LED status, AIR timer status, text field values, version, and distribution information.
Command Endpoint:
curl "http://127.0.0.1:8010/api/command?cmd=LED1:ON"Sends commands and returns JSON response with status confirmation.
OnAirScreen can be controlled via MQTT and integrates seamlessly with Home Assistant using MQTT Autodiscovery.
Configure MQTT settings in the OnAirScreen settings dialog (Server, Port, Username, Password, Device Name).
Base Topic:
The MQTT base topic is automatically generated from onairscreen + a unique device ID (last 6 hex characters of the MAC address). This ensures each OnAirScreen instance has a unique topic, even when multiple instances are running on the same network. For example: onairscreen_a1b2c3.
Home Assistant Integration: OnAirScreen automatically publishes device configurations to Home Assistant, creating:
- LED Switches (LED1-4): Control LEDs on/off
- AIR Timer Switches (AIR1-4): Start/stop timers
- AIR Timer Sensors (AIR1-4 Time): Display elapsed time in seconds
- Reset Buttons (AIR3/AIR4 Reset): Reset timers to 0:00
- Text Entities (NOW, NEXT, WARN): Set and display text fields
MQTT Topics: All commands use the same format as UDP/HTTP API commands, published to:
{base_topic}/led{1-4}/set          → ON/OFF
{base_topic}/air{1-4}/set          → ON/OFF
{base_topic}/air{3-4}/reset        → PRESS (button)
{base_topic}/text/now/set          → TEXT
{base_topic}/text/next/set         → TEXT
{base_topic}/text/warn/set         → TEXT
Status updates are automatically published to:
{base_topic}/led{1-4}/state         → ON/OFF
{base_topic}/air{1-4}/state         → ON/OFF
{base_topic}/air{1-4}/time          → seconds (integer)
{base_topic}/text/{now|next|warn}/state → TEXT
Example using mosquitto_pub:
The base topic is automatically generated (e.g., onairscreen_a1b2c3). Replace {base_topic} with your actual base topic:
mosquitto_pub -h mqtt-broker -t onairscreen_a1b2c3/led1/set -m "ON"
mosquitto_pub -h mqtt-broker -t onairscreen_a1b2c3/air3/set -m "ON"
mosquitto_pub -h mqtt-broker -t onairscreen_a1b2c3/air3/reset -m "PRESS"
mosquitto_pub -h mqtt-broker -t onairscreen_a1b2c3/text/now/set -m "Current Song"| UDP Command | Function |
|---|---|
LED1:[ON/OFF/TOGGLE] |
switch LED1 on/off/toggle |
LED2:[ON/OFF/TOGGLE] |
switch LED2 on/off/toggle |
LED3:[ON/OFF/TOGGLE] |
switch LED3 on/off/toggle |
LED4:[ON/OFF/TOGGLE] |
switch LED4 on/off/toggle |
NOW:TEXT |
set TEXT in first footer line |
NEXT:TEXT |
set TEXT in second footer line |
WARN:TEXT |
set TEXT and switch on red warning mode (priority 0) |
WARN:Prio:TEXT |
set TEXT with priority (Prio: 1=Medium, 2=High) |
AIR1:[ON/OFF/TOGGLE] |
start/stop/toggle Mic Timer |
AIR2:[ON/OFF/TOGGLE] |
start/stop/toggle Phone Timer |
AIR3:[ON/OFF/RESET/TOGGLE] |
start/stop/reset/toggle Radio Timer |
AIR3TIME:seconds |
set Radio Timer to given value in seconds |
AIR4:[ON/OFF/RESET/TOGGLE] |
start/stop/reset/toggle Stream Timer |
CMD:REBOOT |
OS restart |
CMD:SHUTDOWN |
OS shutdown |
CMD:QUIT |
quit OnAirScreen instance |
CONF:General:stationname=TEXT
CONF:General:slogan=TEXT
CONF:General:stationcolor=COLOR
CONF:General:slogancolor=COLOR
CONF:LED[1-4]:used=[False|True]
CONF:LED[1-4]:text=TEXT
CONF:LED[1-4]:activebgcolor=COLOR
CONF:LED[1-4]:activetextcolor=COLOR
CONF:LED[1-4]:autoflash=[False|True]
CONF:LED[1-4]:timedflash=[False|True]
CONF:Clock:digital=[True|False]
CONF:Clock:showseconds=[True|False]
CONF:Clock:digitalhourcolor=COLOR
CONF:Clock:digitalsecondcolor=COLOR
CONF:Clock:digitaldigitcolor=COLOR
CONF:Clock:logopath=PathToLogo
CONF:Network:udpport=PORT
CONF:Network:tcpport=PORT
OnAirScreen uses a unified error handling system with custom exceptions for consistent error tracking and debugging:
- Network Errors:
UdpError,HttpError,WebSocketError,MqttError,PortInUseError,PermissionDeniedError - Command Errors:
CommandParseError,CommandValidationError,UnknownCommandError,InvalidCommandFormatError - Configuration Errors:
SettingsError,InvalidConfigValueError - Validation Errors:
TextValidationError,ColorValidationError,ValueValidationError - API Errors:
WeatherApiError,JsonParseError,JsonSerializationError - Encoding Errors:
EncodingError - Widget Errors:
WidgetAccessError
All exceptions inherit from OnAirScreenError and include context information for better debugging. The log_exception() helper function provides consistent logging across the application.
HTTP error responses are automatically mapped to appropriate status codes:
- Validation/Parse errors → 400 (Bad Request)
- Unknown commands → 404 (Not Found)
- Port/Permission errors → 503 (Service Unavailable)
- Serialization errors → 500 (Internal Server Error)
CONF:CONF:APPLY=TRUE